> Examining Plastic Bags
Learn how we match a plastic bag to its source
> Can one bag be matched to a batch?
Every plastic bag examination starts with a fundamental question – does the bag come from the batch of bags associated with the suspect?
It turns out that, because of the way plastic bags are produced, it is possible to match a single bag to other bags produced in the same batch. To establish an identity, the examiner makes use of the following marks:
– Marks from the production process (extrusion marks)
– Positions of folds, print, cuts
– Overlapping spots
– Seal lines
We will briefly cover how these characteristics are produced, how they can be identified, and how we use them to match a bag to its source.
> Extrusion Marks
Fold, print and cut positions are often visible to the eye, but extrusion marks are harder to see. This is why we need a better understanding of extrusion marks.
The extrusion method of producing plastic bags leads to characteristic marks in the plastic. These are unique to a given extrusion machine and so a batch of bags produced from the same machine will often have continuous extrustion lines through the entire batch.
Marks from the extrusion process include: wave patterns, mechanical scratch marks, pigment concentration differences, and effects to the general structure of the plastic.
Using the appropriate methods, we can uncover these marks and create comparisons between a bag and its suspected source.
> Method 1/5:
Light Boxes and Background Light
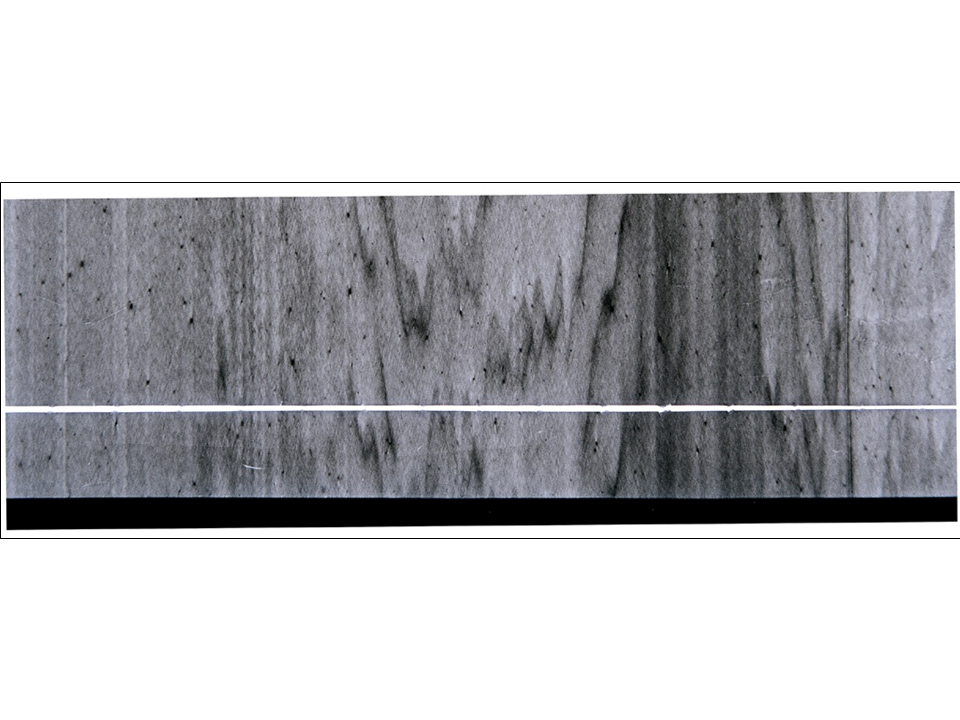
The most elementary method for examining plastic bags is to illuminate the bag with white light. The light passes through the plastic and on the other side we may observe details such as extrusion marks.
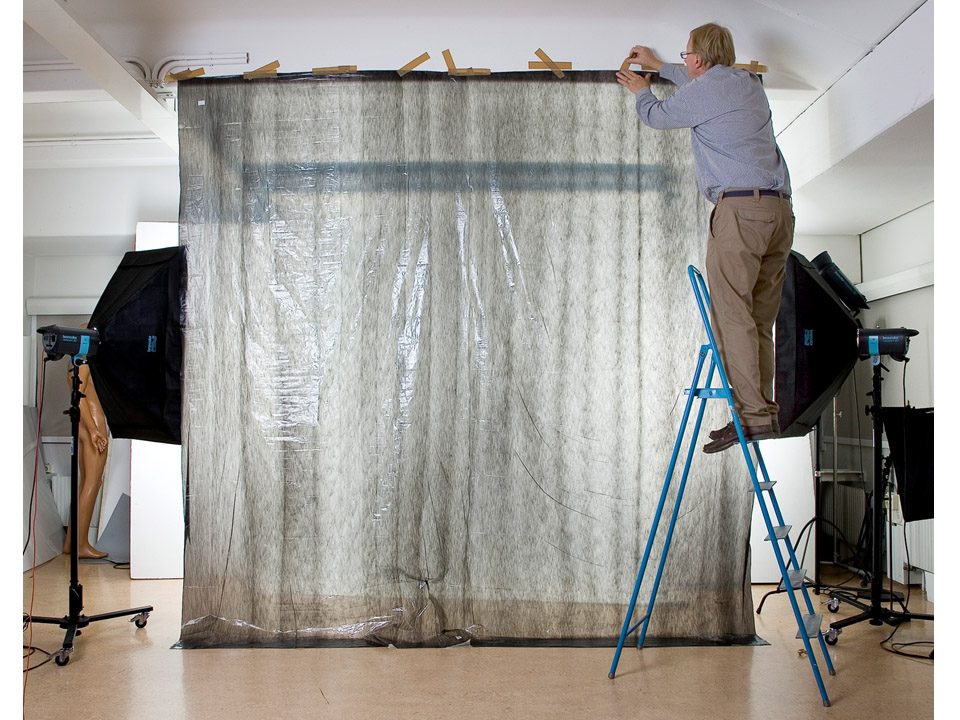
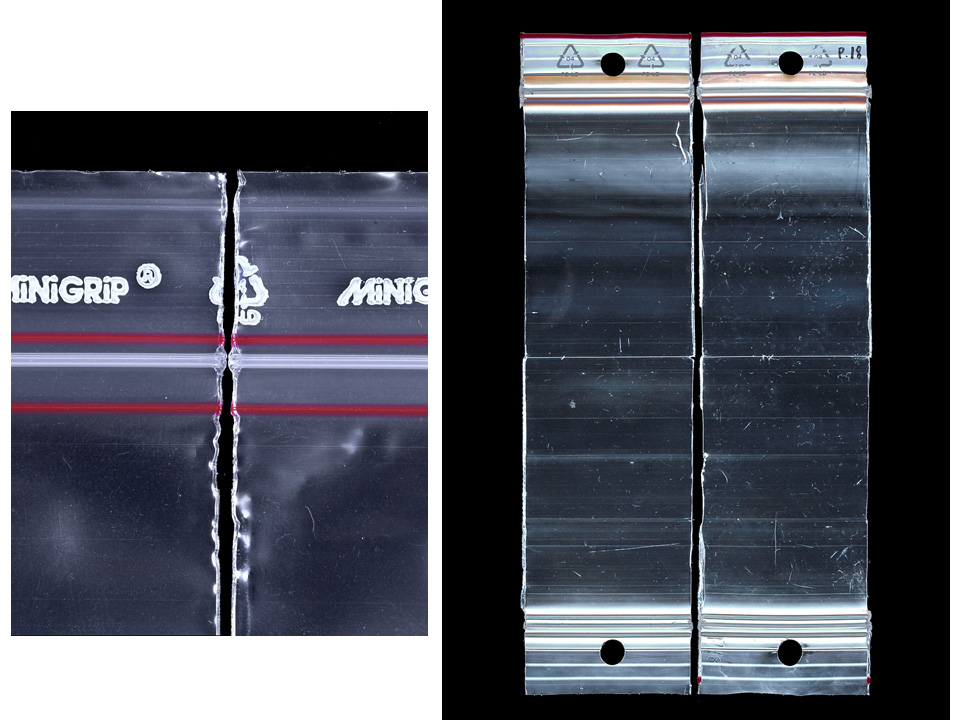
Usually, we use light boxes for this purpose but with large plastic bags the examiner has to be resourceful when recreating the light box method.
In this case, a large plastic bag was found and a roll of similar plastic bags recovered from a suspect. How can we achieve adequate background lighting over such a large area?
Using a large room with studio lighting, the examiners were able to superimpose the two bags in a picture. This method was effective when sorting from all candidates.
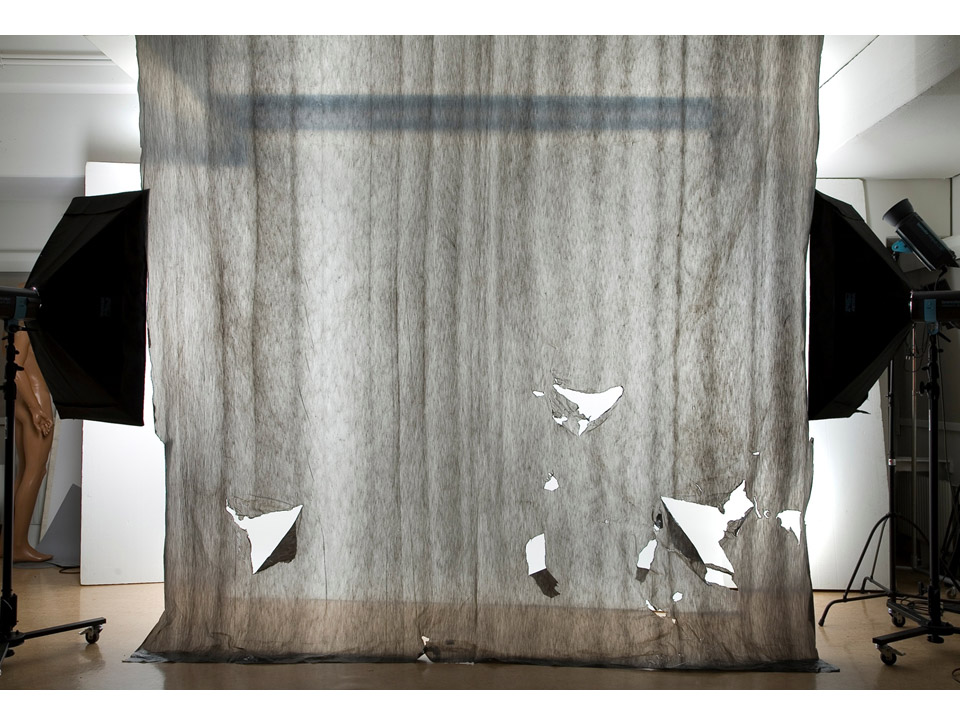
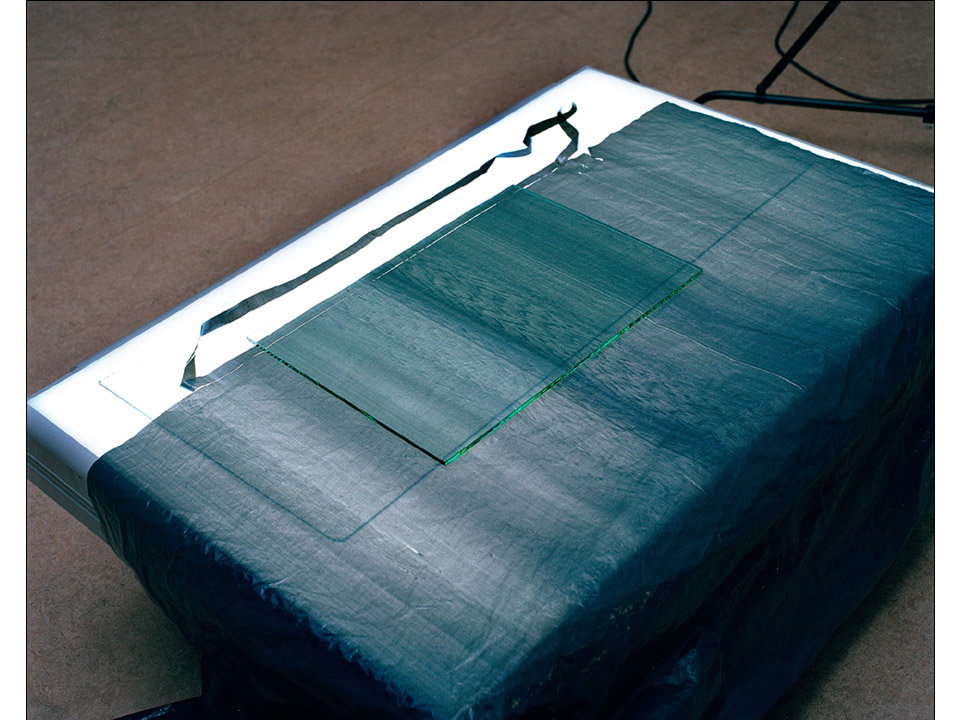
Of course, this was not enough to claim an identity. Next, the examiners used a large light box to make a detailed comparison. They cut a strip from one of the bags and placed in along the edge of the other. Two glasspanes were used to hold the bags in place.
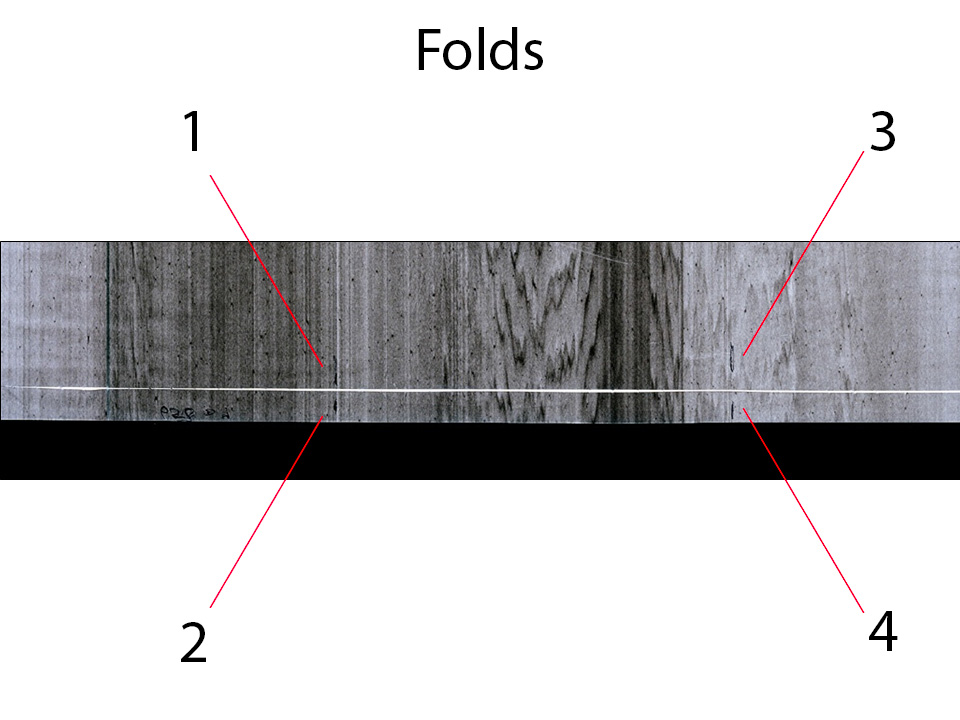
Looking closely, we can see that the examiner has marked folds in the bags that won’t be visible on the lightbox, but that need to align on either side to support an identity.
The folds, extrusion marks, cut marks, and pigmentation patterns matched, and the examiners claimed a strong identity.
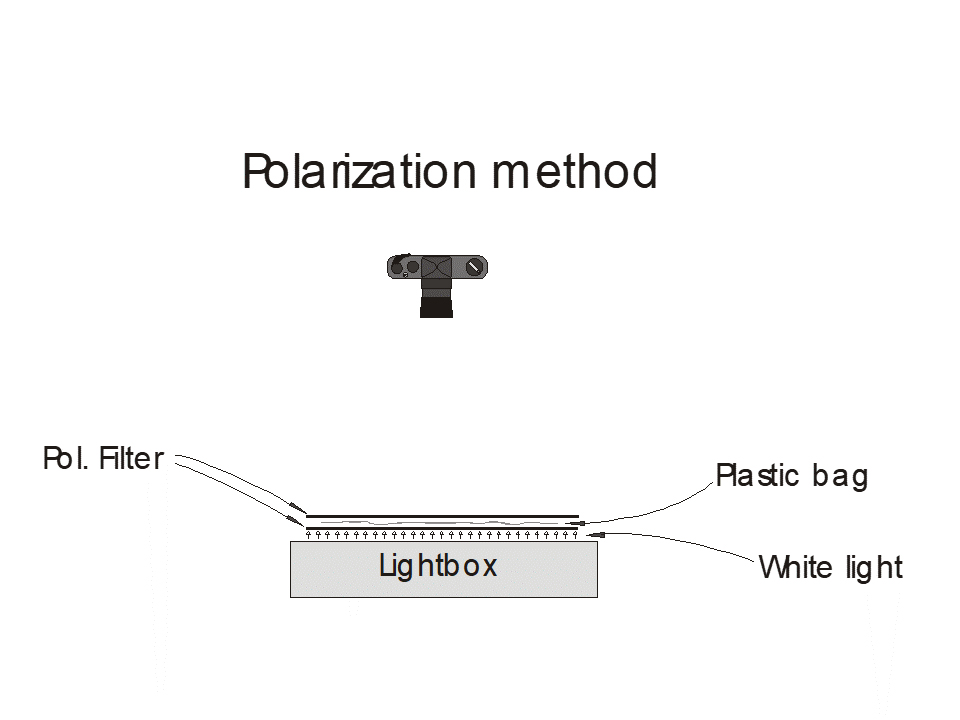
> Method 2/5: Polarization
With two polarization filters and a light box we can examine wave patterns that have been created in the extrusion process.
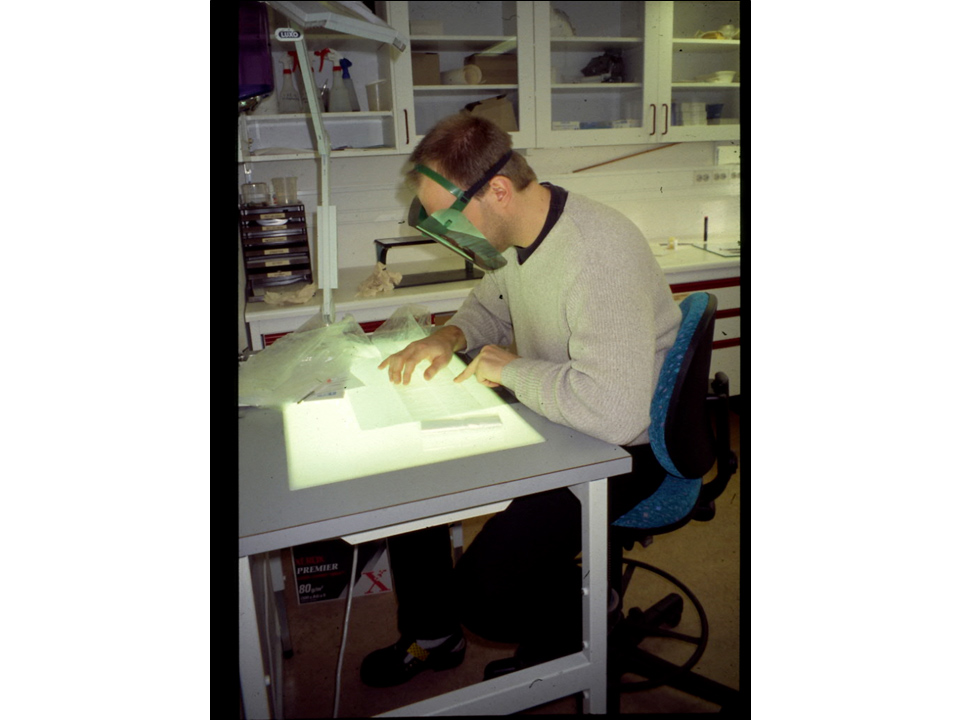
When the examiner needs to sort candidates from a large batch, a polarization visor can be used to speed up the process. For photography, a polarization filter should be placed on either side of the bag, immediately on top of the lightbox.

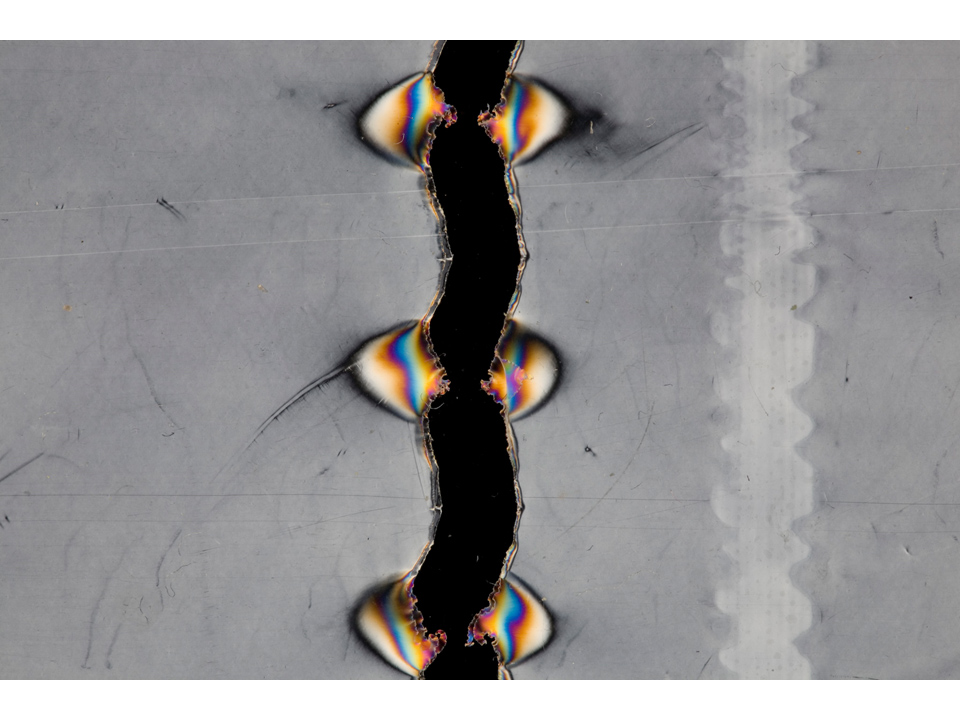
> Method 3/5: Projection
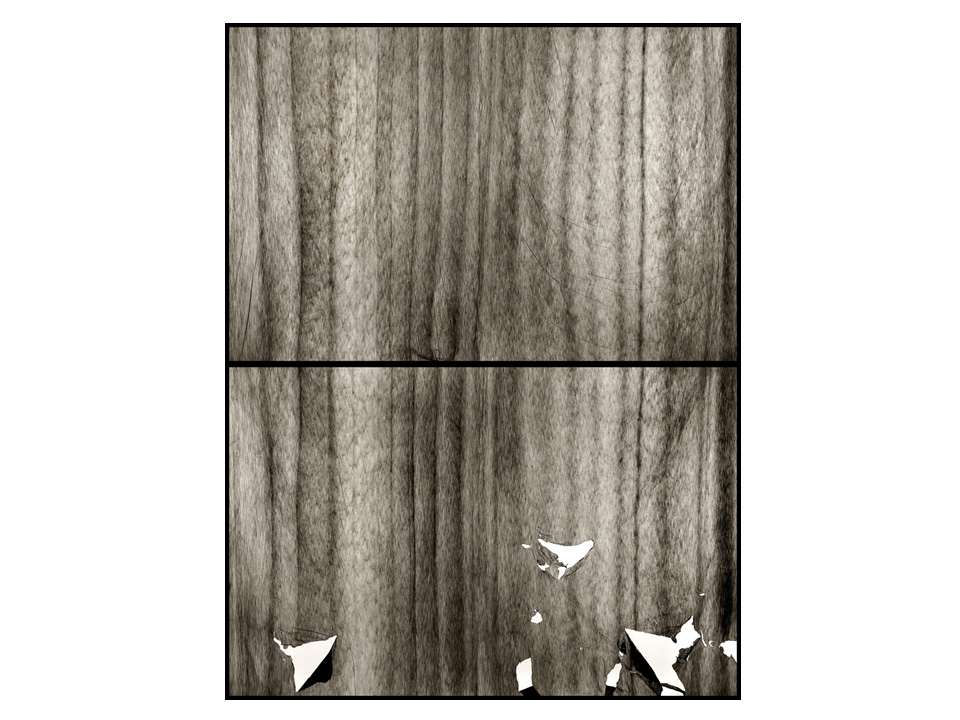
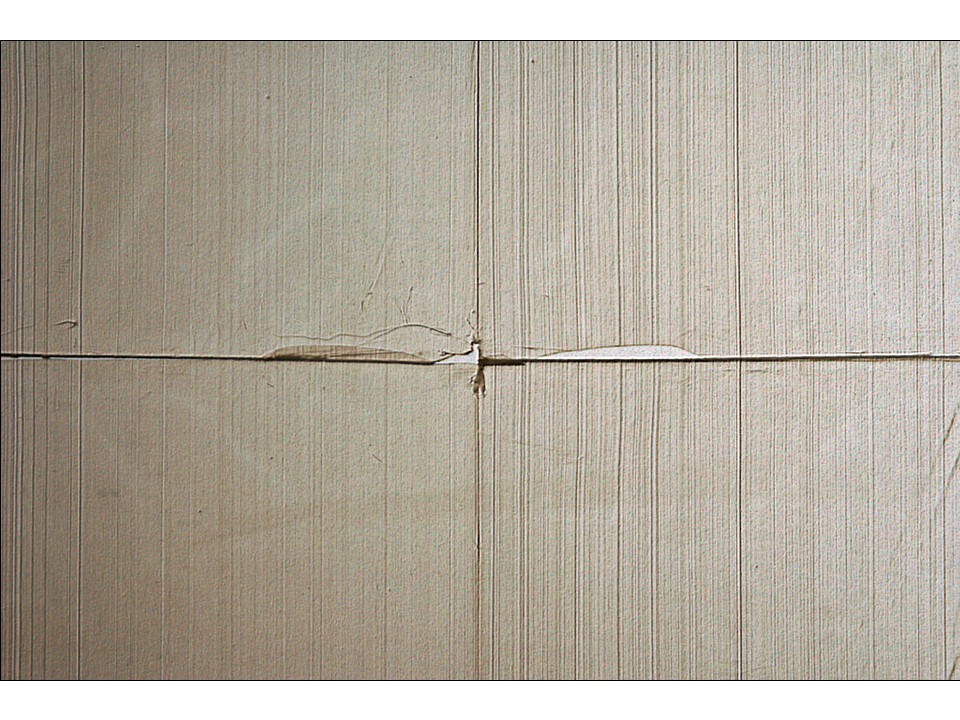
Similar to the polarization method, the projection method can help see wave patterns. The projection method only works on clear plastic bags.
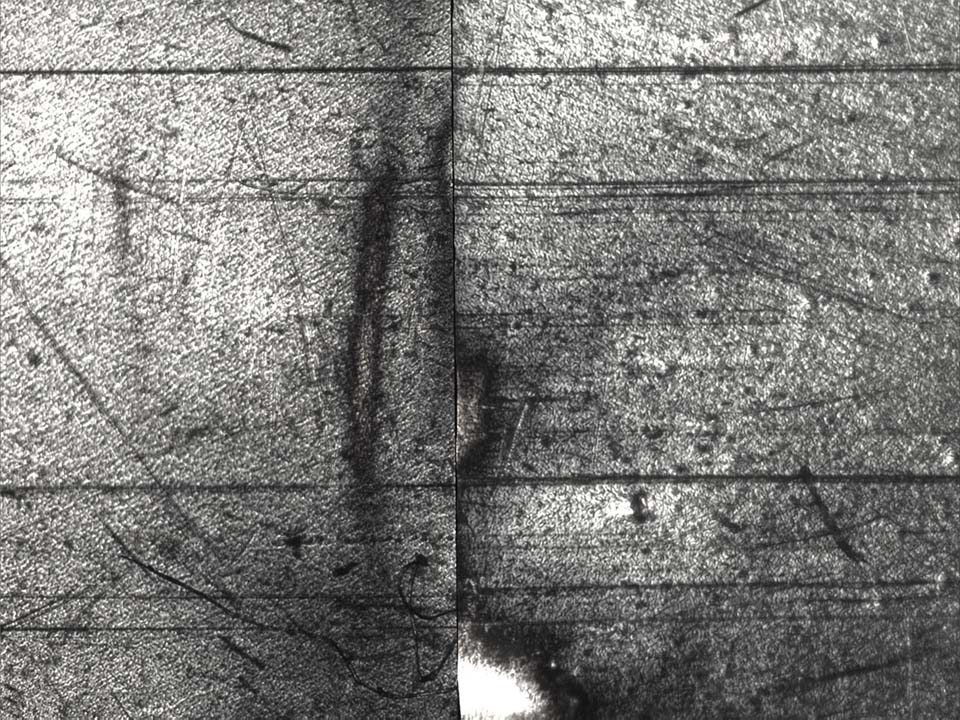
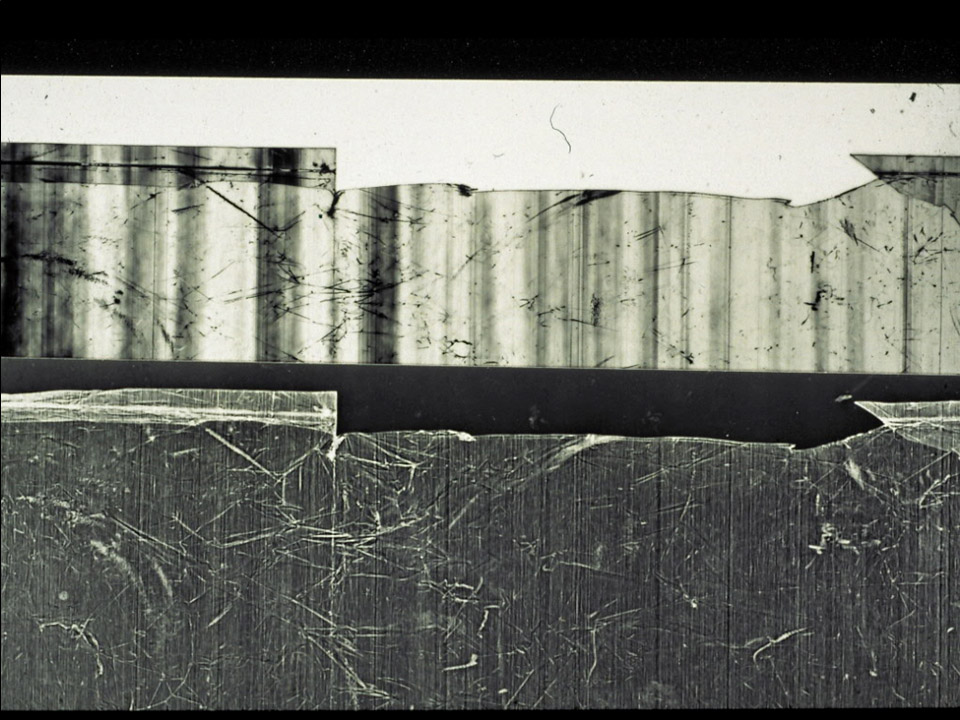
Here is an image showing a comparison of using the projection and polarization method on the same object. The top half was captured using polarization, and the bottom half with projection.
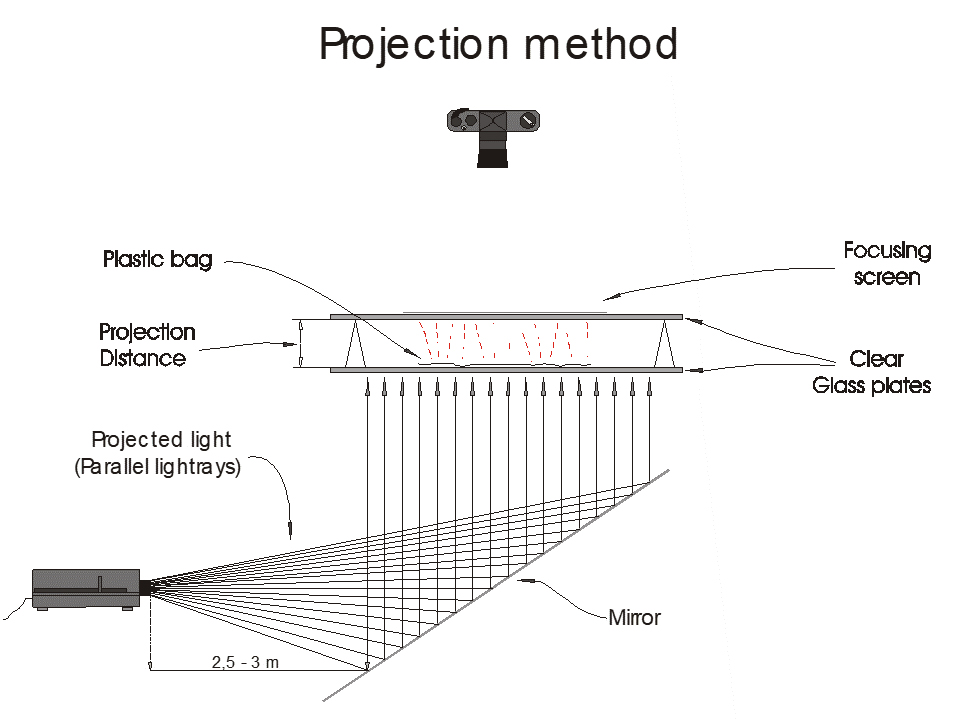
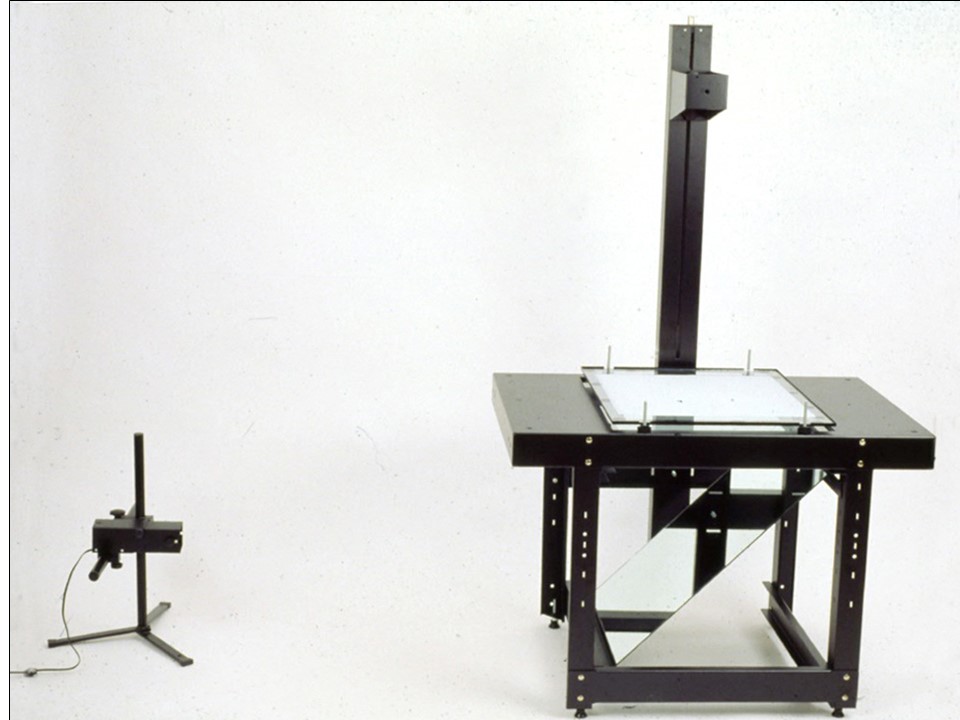
The projection method is summarised by the diagram below. It is important to note that the distance between the glass plates should be configured for each examination. The best distance is usually found through trial and error.
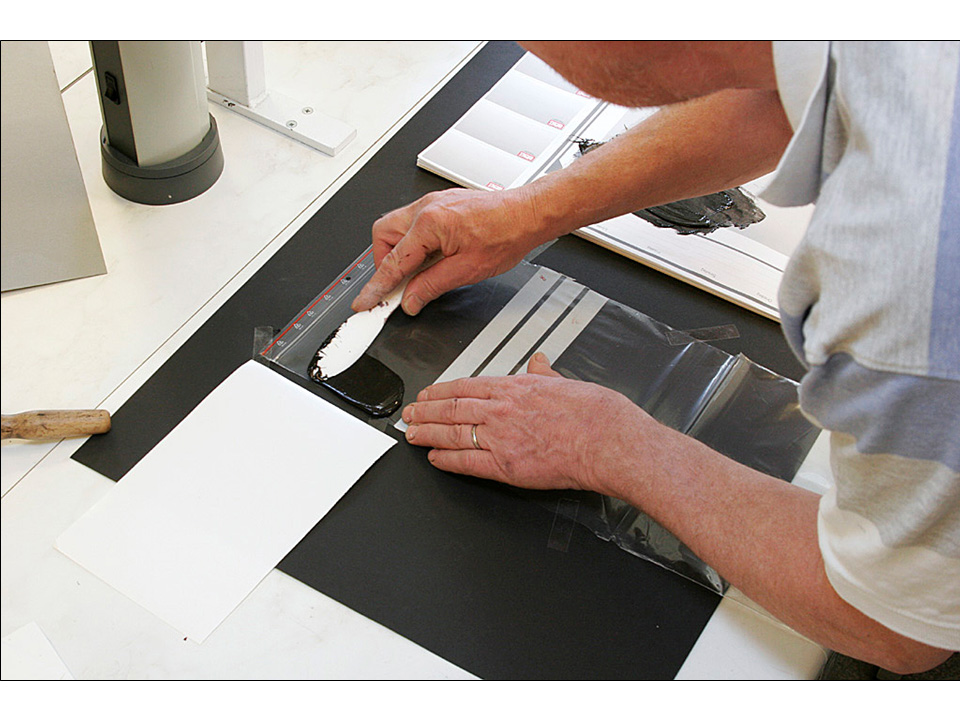
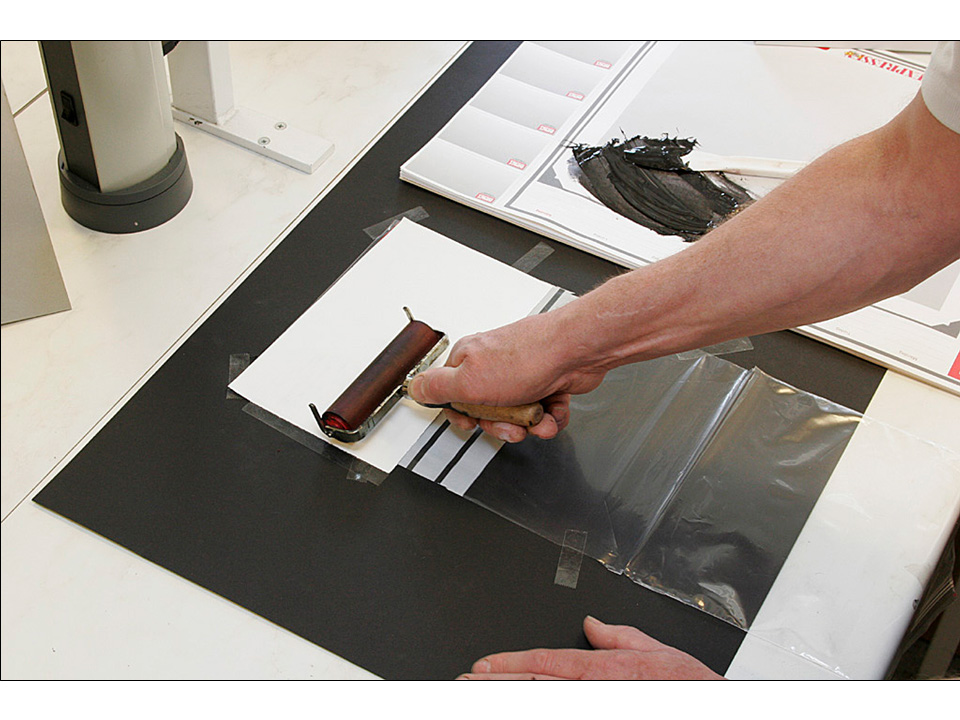
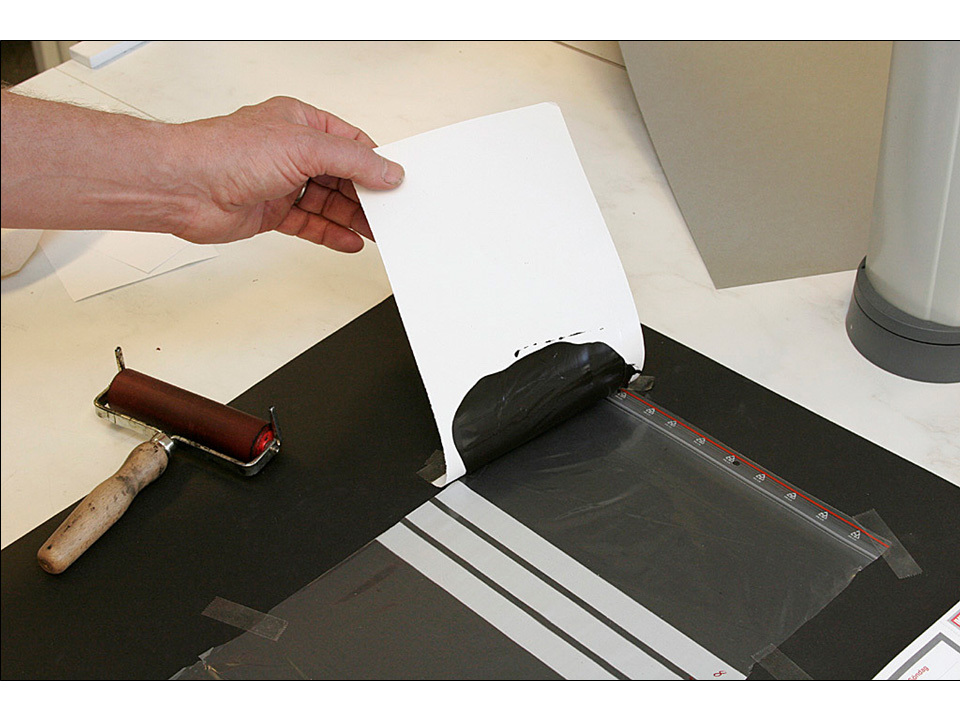
> Method 4/5: Casting
Black MIKROSIL provides an excellent method of comparing mechanical scratch marks. When making a casting of the surface of the bag, we are only lifting surface level patterns and our examination is not affected by other marks created by the extrusion process.
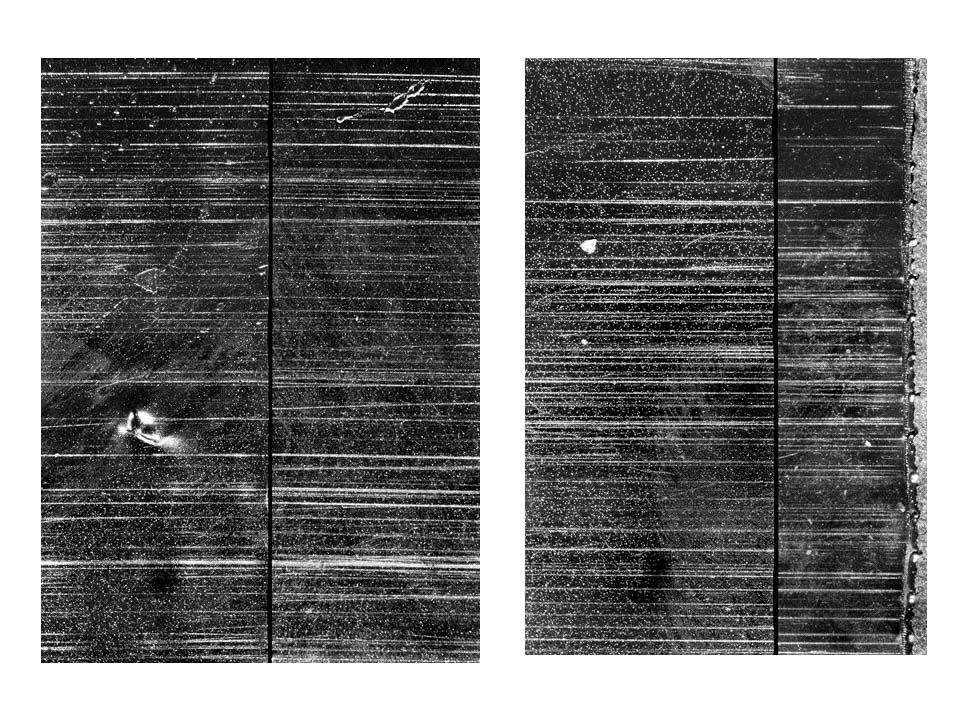
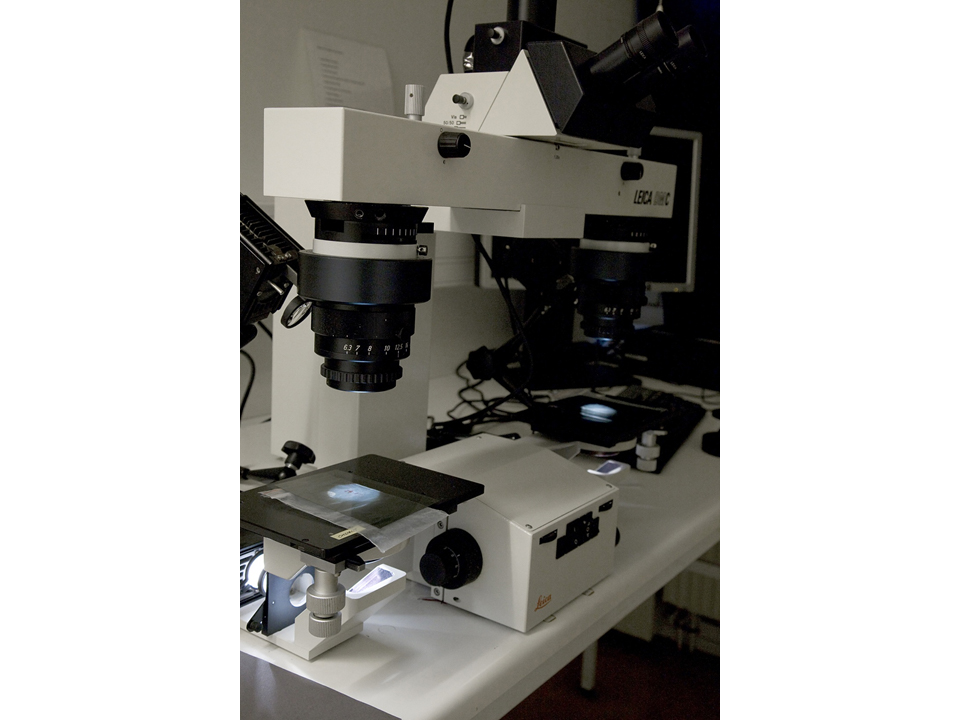
> Method 5/5: Microscope
Another effective way to examine mechanical scratch marks is to use a microscope and backlight them. Polarization filters were also used in the case below.