> Vacuum table
> Vacuum table
For flattening wrinkled paper
This method can be used if the paper is wrinkled. The vacuum table flattens the paper.
Easy to use. A traditional vacuum cleaner is used to create a vacuum in the table.
Here, an example is how to use a vacuum table to flatten the paper and that you can use Mikrosil as a lifting method to get a good result.

> Vacuum table for lifting shoes print
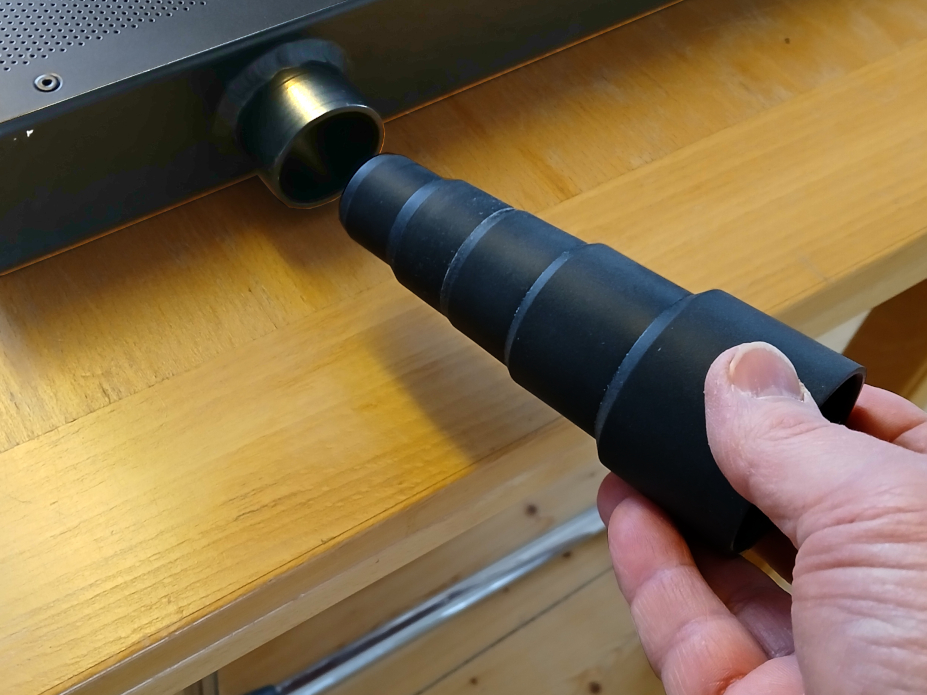
Connect a vacuum cleaner tube to the vacuum tables.
If they do not fit, you can also use the tube adapter for different cleaner tubes.
Place the paper from the crime scene on the table, and the paper wants to stretch out.
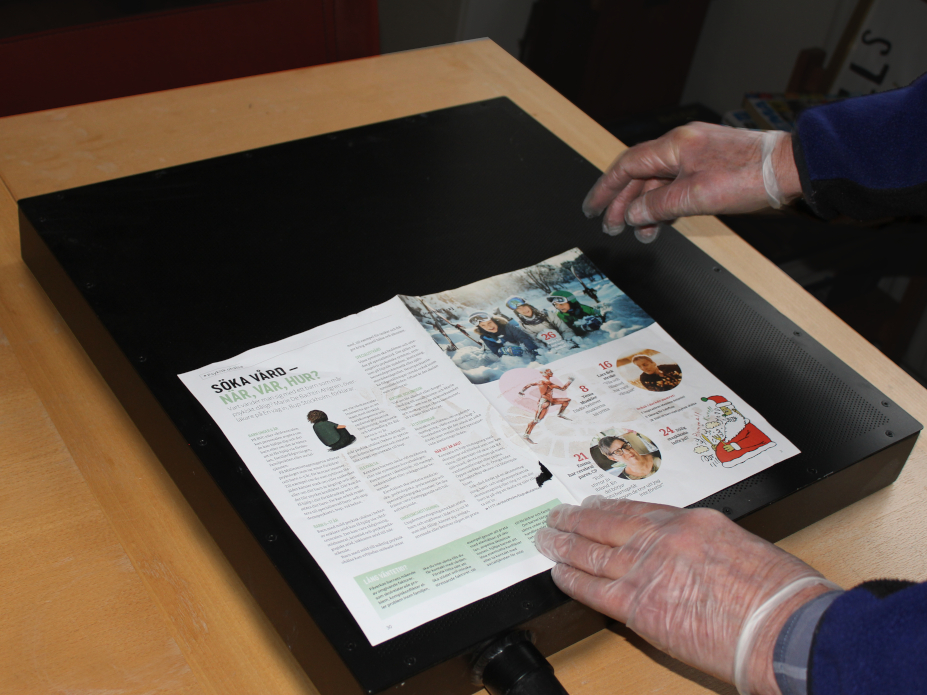
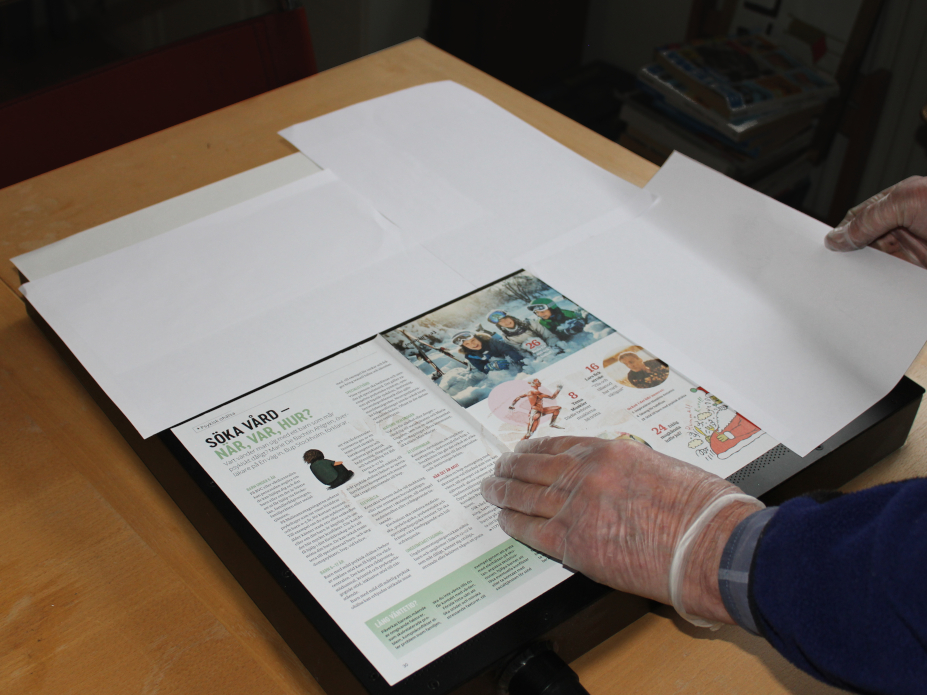
To make the paper adhere better to the Vacuum table.
Cover the remaining surface with paper over the entire area so to get better suction power. It is to get a good vacuum under the surface of the paper.
Prepare by cutting out silicone paper corresponding to the size of the footprints.
The paper must overlap the entire shoe print.

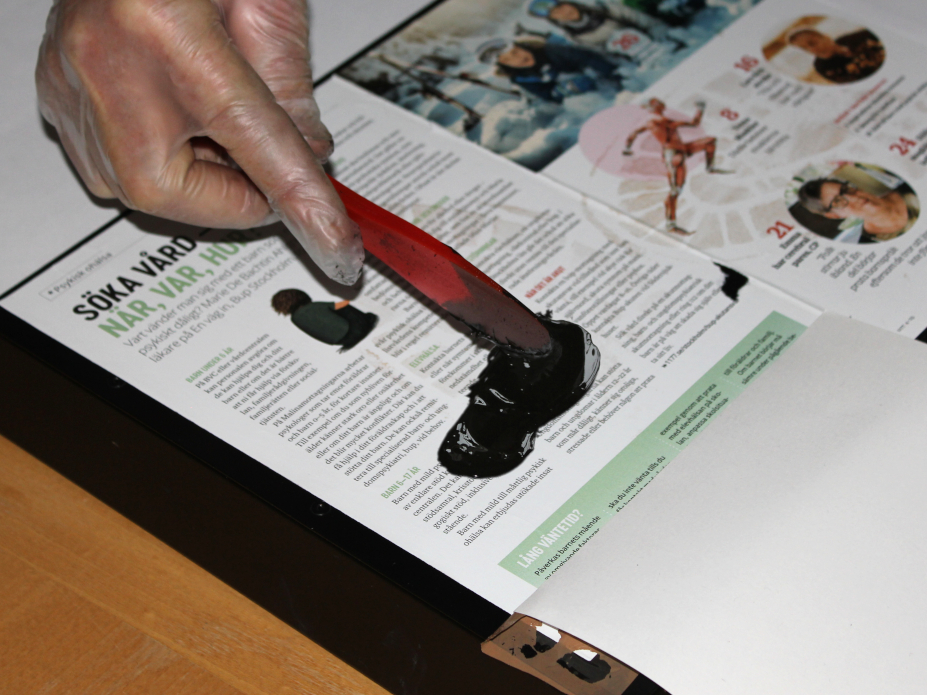
Tape the silicone paper with the smooth side down and attach it to one side next to the footprint, so the silicone paper can lie still Where you roll out Mikrosil
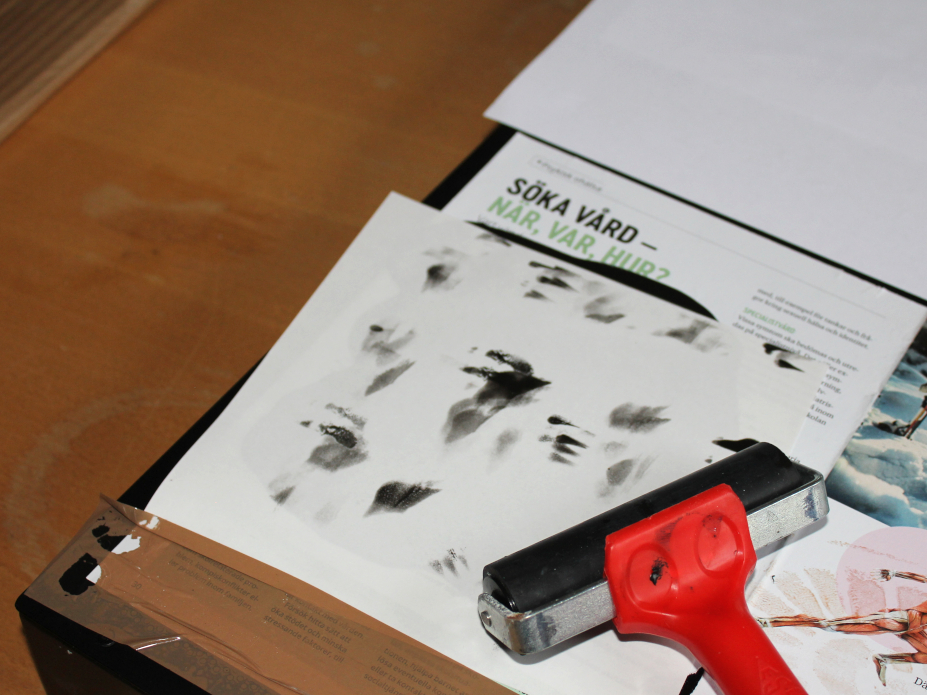
Press out the base material and hardener from the tube and mix them together. You can see the amount of mixture here.
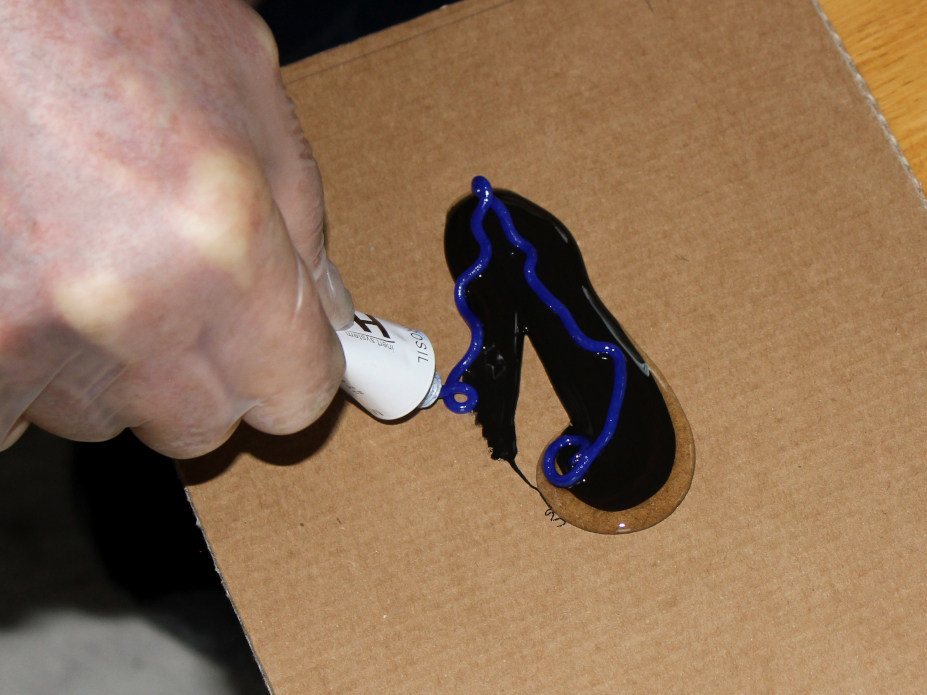
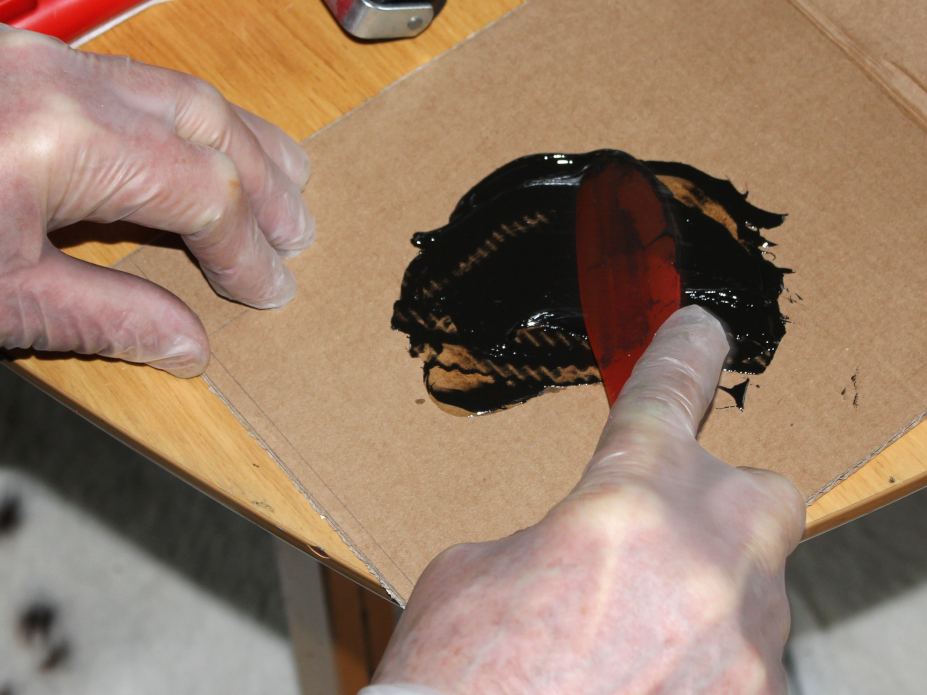
Mix the base material and hardener quickly until a uniform color results. Limit mixing time to 20-30 sec.
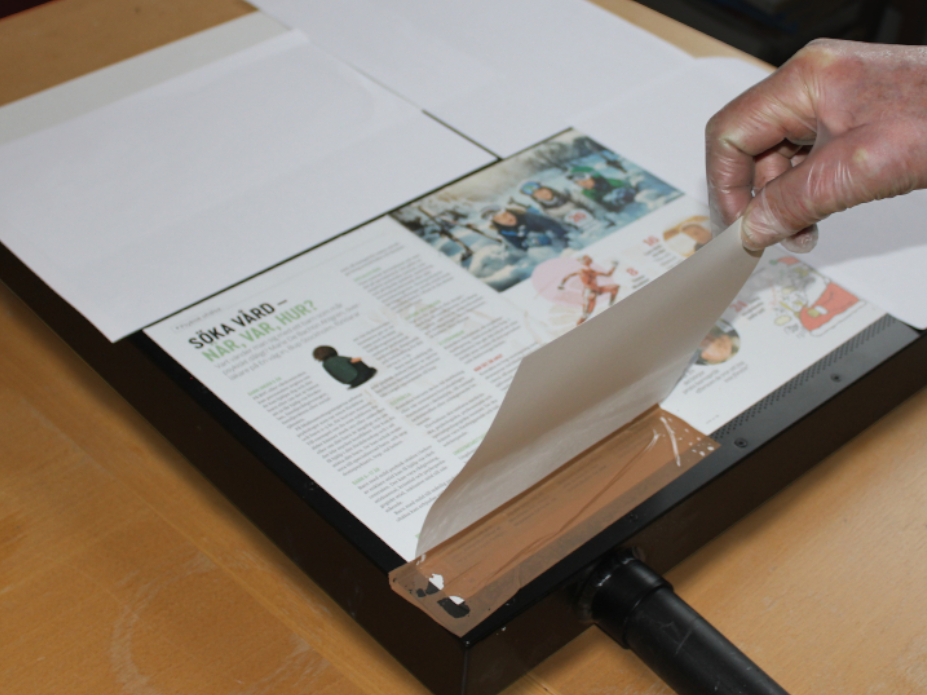
Switch on the vacuum cleaner.
Apply the Mikrosil mixture on to the paper behind the footprint
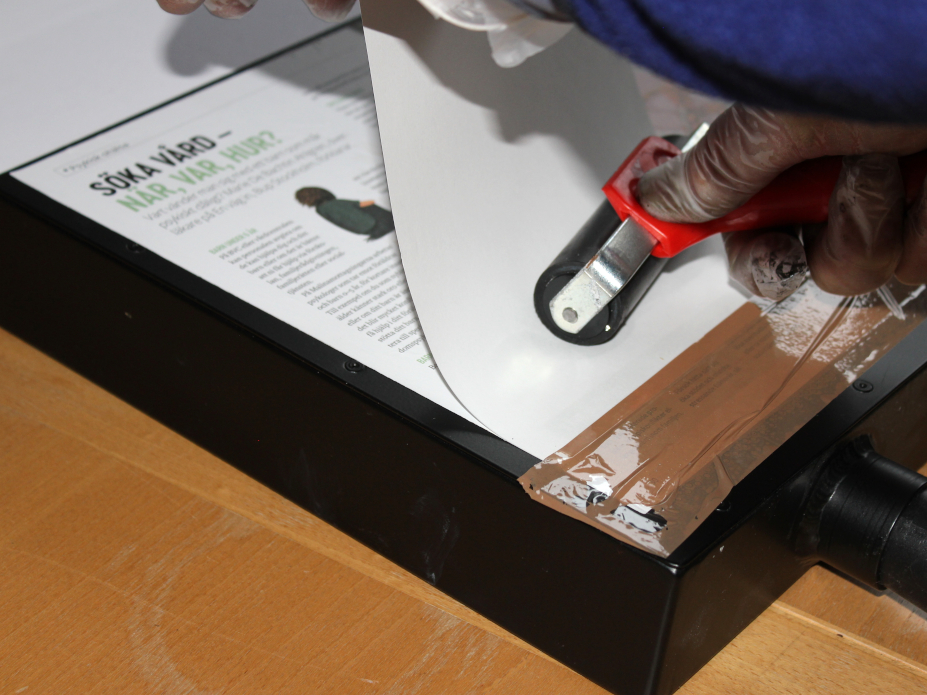
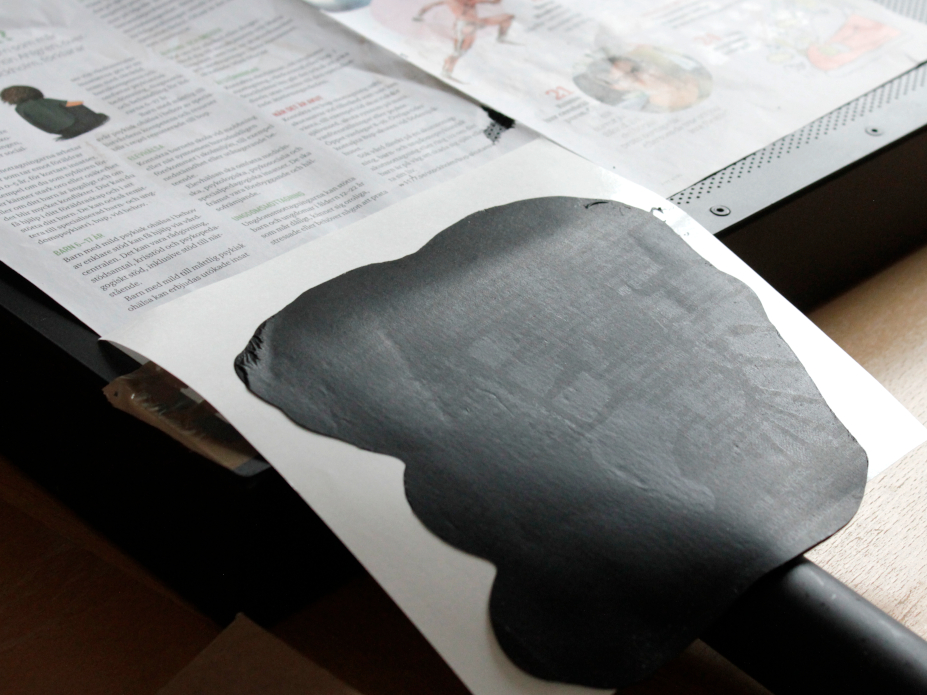
Roll out the silicone paper and the mixture with the rolling pin.
Continue to roll out the mixture.
Press firmly so that there are no air bubbles and as evenly as possible over the whole surface footprint. Switch off the vacuum cleaner.
Let it harden for 10 to 15 minutes. Be patient. It is better to wait a little longer.