Dust is more than dirt, mostly a mixture of different Things like pollen, textile fibers, dead skin cells, plants Parts, air pollutants, small particles from concrete, Plaster, asphalt and more.
Dry dust on a shoe sole Gives high quality prints on floors and paper. These Prints can be lifted with Electrostatic Technique. The electrostatic dust print lifter εDust+ is designed to It gives a good result by lifting dust prints from most types. Of surfaces.
Safety and hazard information. Danger high voltage, only to be used by trained personnel.
The unitproduces up to 12000 volts with a low current stress, but can potentially cause an electrical shock. Do not touch the lifting film, high voltage probe or ground plate while the power is active
> Lifting prints from smaller areas
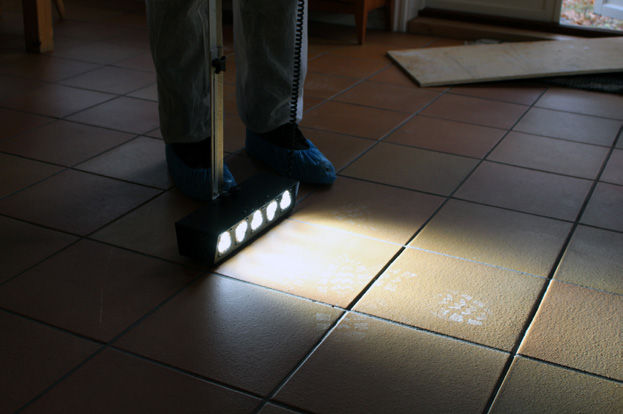
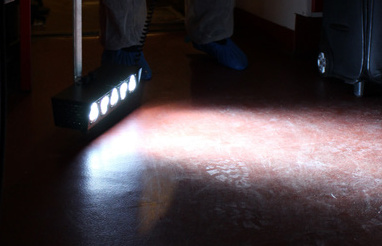
First, search the floor for footprints with oblique, low-angle light. Here we use a Versa Light Max
After you have found footprints, there may be a lot of loose debris on the floor. To get a good print for the lifting film, you may have to remove debris that lies on the floor. Do that with a small blower.
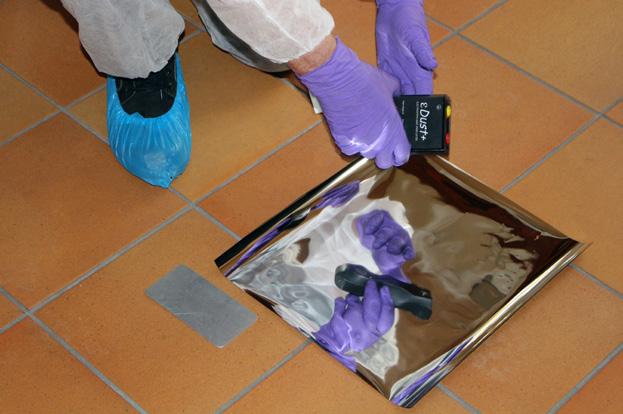
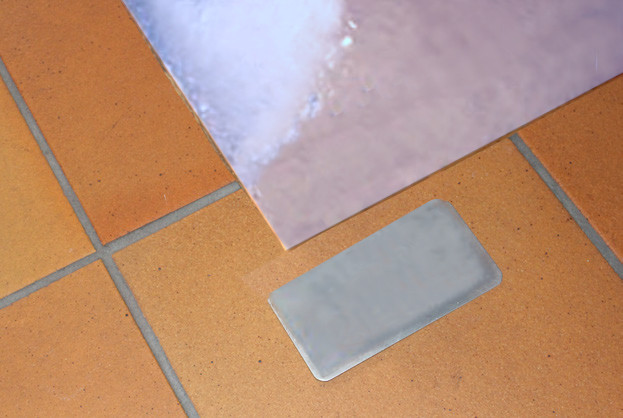
Cut an appropriate size sheet of lift film from the roll and place it on the found footprint with the silver side facing up.
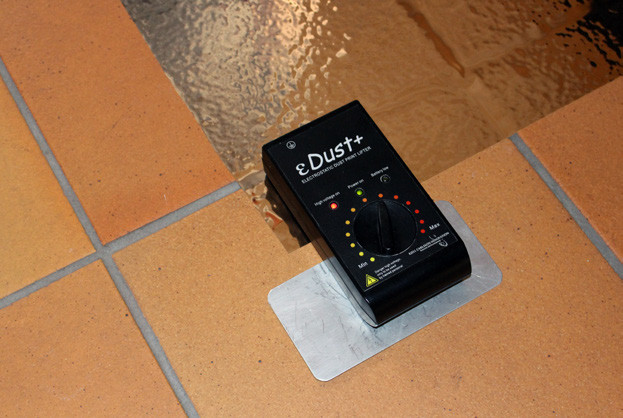
Place the ground plate on the floor 1 – 2 cm from the lifting film edge.
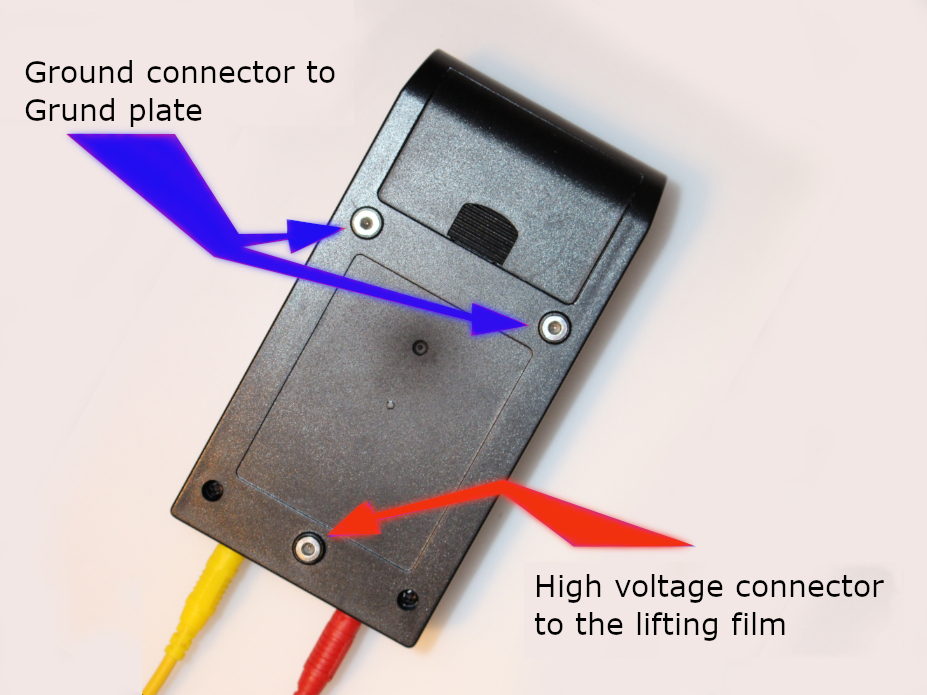
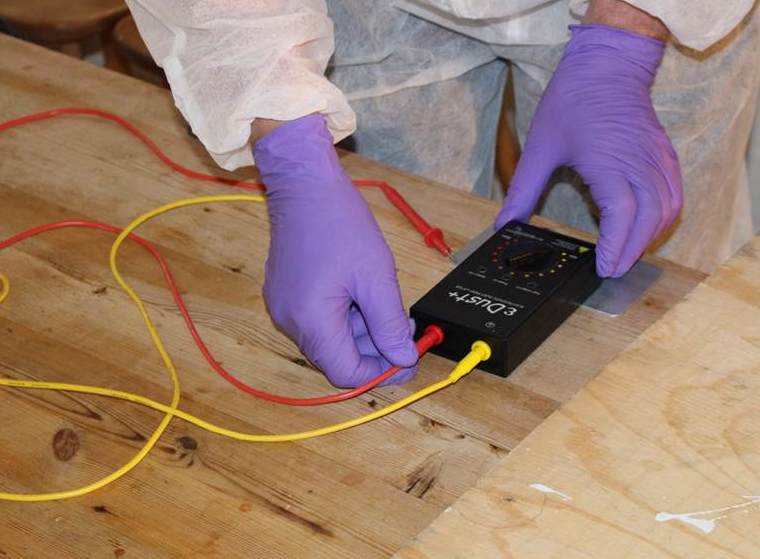
Placed the εDust+ Unit on the ground plate and the two ground connectors to the ground plate and the high voltage, connector to the lifting film.
Switch on the high voltage and adjust to a suitable level. Lower voltage level for stone floor and higher for wooden and plastic floors. If the red diode is not lighted, check that the ground connector has contact with the ground plate and high voltage connector to the lifting film.
If only one ground connector has contact with the ground plate, no high voltage is produced. This function is for minimizing the risk of electrical shocks by touching the high voltage connector.
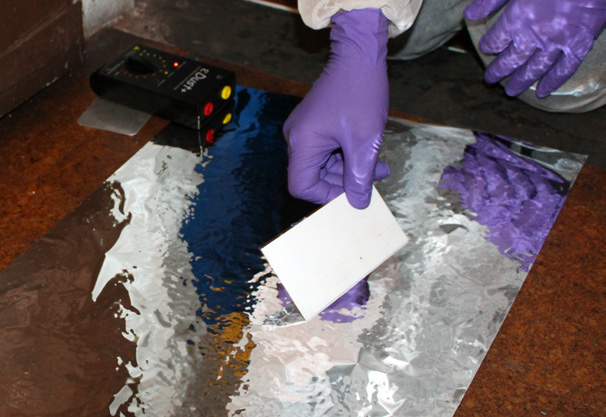
Air bubbles between the lifting film and floor can be easy. Be reduced with the “Plastic Flattener”
Certain floor types like wood and plastic floors sometimes do not provide enough ground connection.
To increase the ground voltage and maximize the dust lifting. Make the area of ground connection larger by using a piece of lifting film, approximately 30 x 40 cm like shown in the picture.
Place that film on the silver facing the floor, 3-4 cm from the lifting film and overlap a small part of the ground plate. Then use the εDust+ unit in the normal way..
> Lifting prints from larger areas
Search the floor for prints with oblique, low-angle light. Here we use a Versa Light Max.
After you have found footprints, there may be a lot of loose debris on the floor.
To get a good print for the lifting film, you may have to remove debris that lies on the floor. Do that with a small blower.
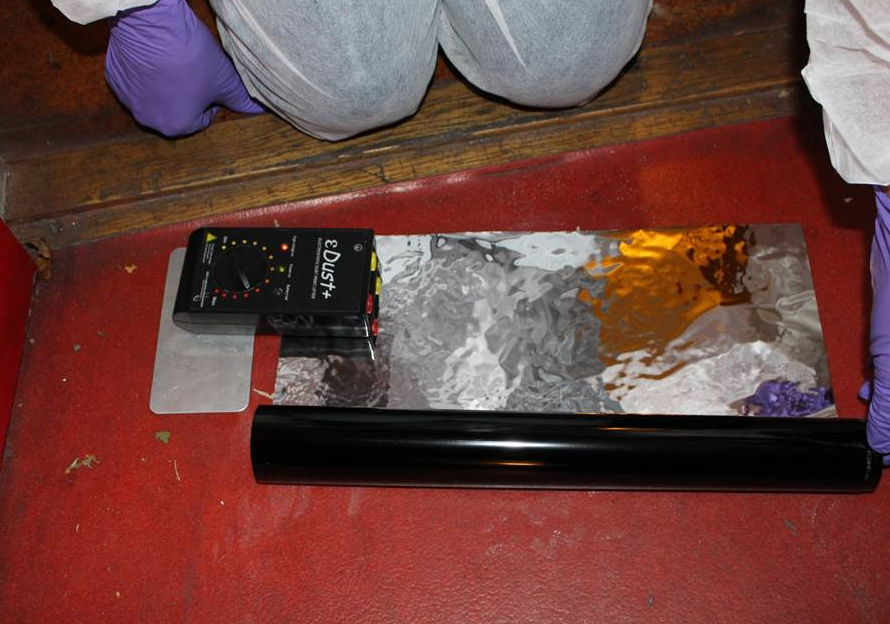
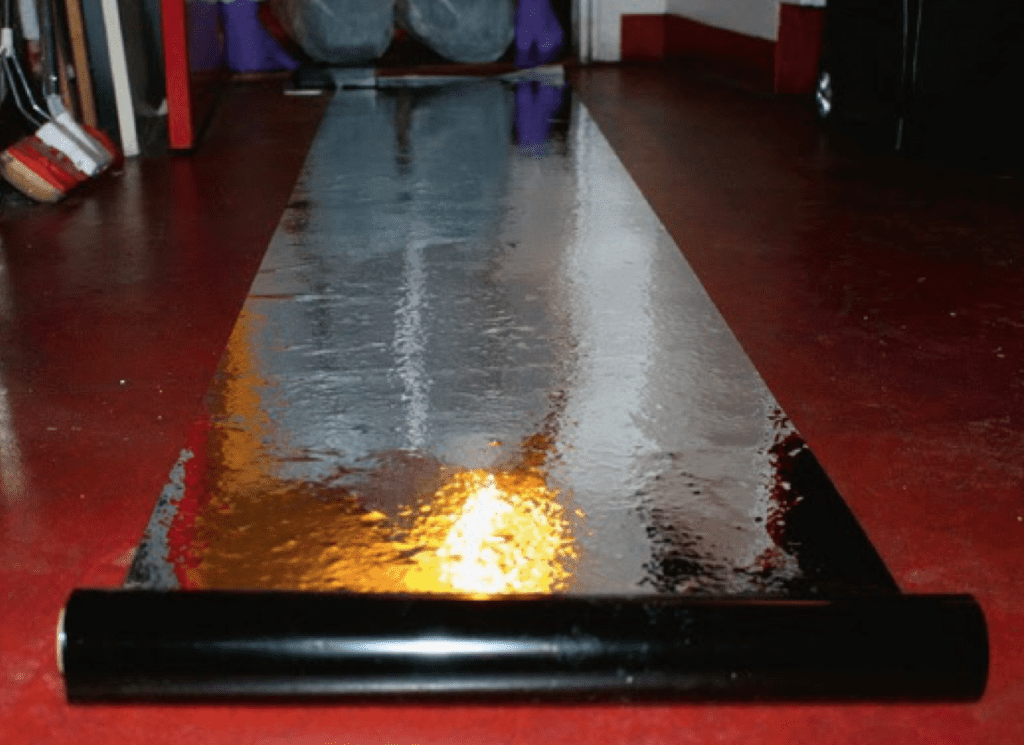
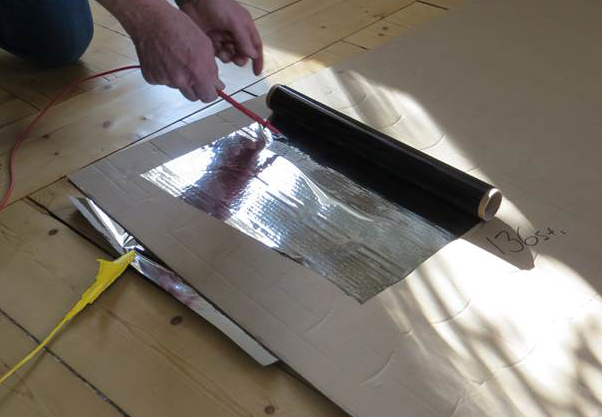
Place the lifting film roll in a suitable position on the floor for rolling out on the interesting area and rollout the lifting film.
At this moment, only 10-15 cm of the film is on the silverside as shown in the picture.
Place the ground plate 1-2 cm from the sheet edge and place the εDust+ placed with both ground connectors to the ground plate and the high voltage connector to the lifting film. Switch on The εDust+
Roll out the lifting film over the floor with High voltage on
Removing air bubbles between the lifting film and the floor. That can easily be reduced with the “Plastic Flattener”.
> Transport and store lifted prints
To avoid electrical shock, when lifting the lifting film, switch off them εDust+ and make sure not to hold or touch the ground – or high voltage connections.
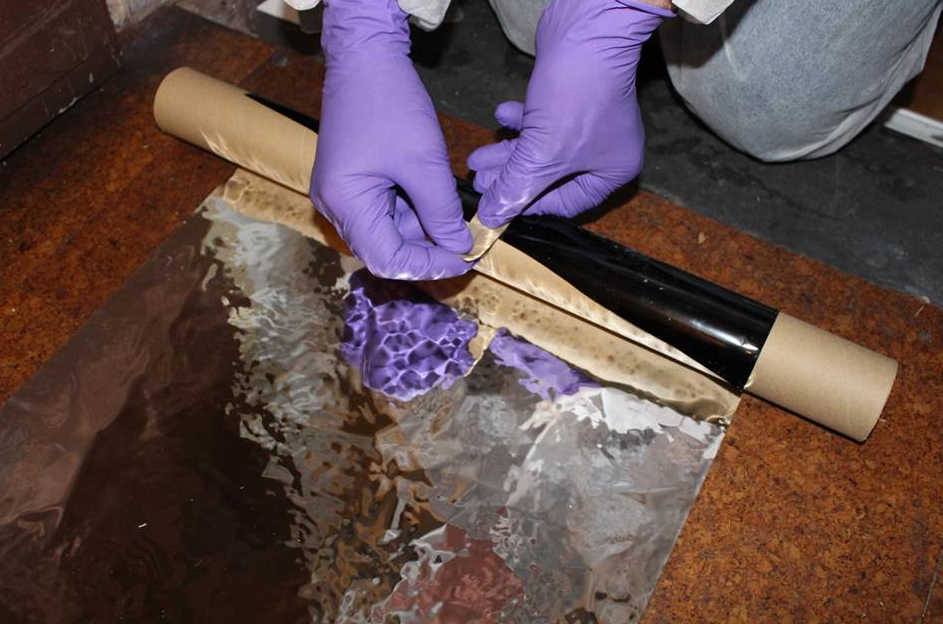
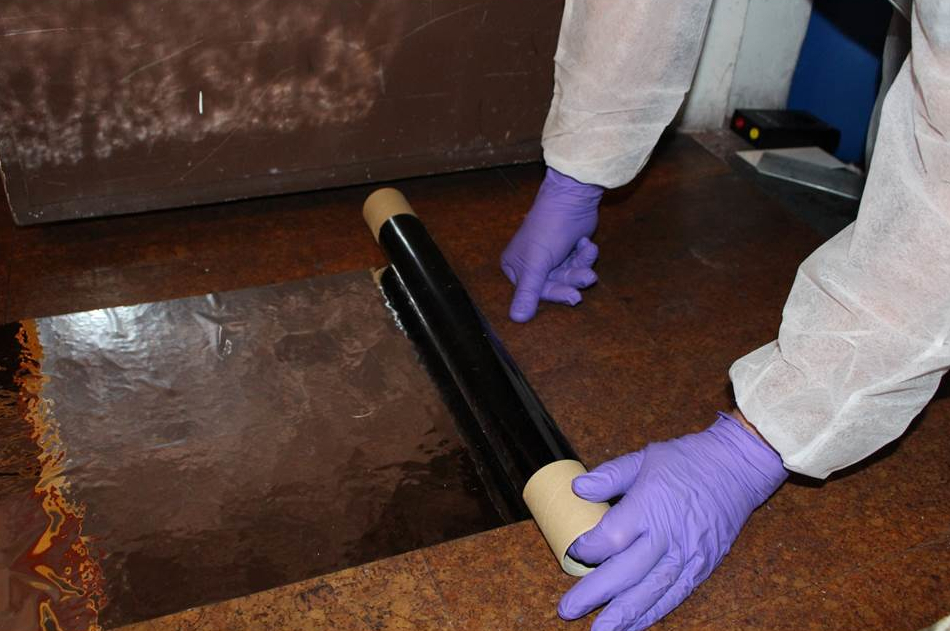
Cut of the used film of the roll. Secure it with tape and roll up the lifting film on a paper tube.
The lifted dust print will not release from the lifting film other than by physical touch.
It means that you can store the film for a long time, waiting for the comparison with suspected shoes.
> Lifting prints from cardboard paper
Lifting prints from cardboard paper and similar items that have inadequate ground lead
Adhere a piece of the lifting film on the underside of the cardboard. This will function as a ground connection.
Connect the yellow ground cable to the yellow socket and the red high voltage probe cable to the red socket on the unit.
Connect the yellow ground cable with a yellow alligator clip to the ground lifting film which is under the cardboard. Place the roll in a suitable position on the cardboard for rolling out.
To avoid electric shock, when lifting the print, make sure not to hold or touch the high voltage connector or the probe.
Switch on the high voltage and apply the electrostatic energy to the film by using the red cable with a high voltage probe and connect to the lifting film. Roll out the lifting film over cardboard and remove air bubbles with a “Plastic Flattener”.
> Photographing lifted prints
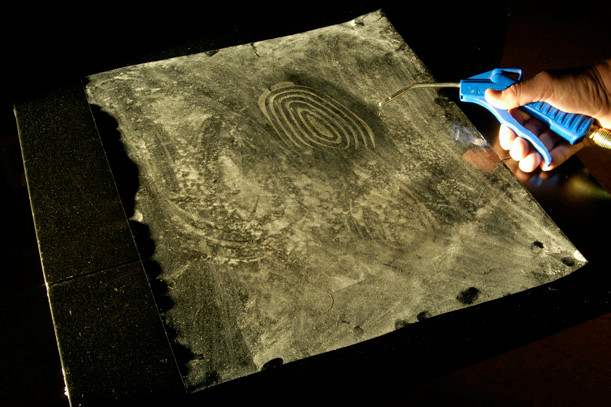
Sometimes the quality and contrast of a lifted print is not as good because of disturbing lifted background dust.
Solving that can be very easy, try and “rinse” the lifted print by blowing the surface with compressed air like the pictures show.
Make sure that no dust from the print is removed when blowing, remove only the background dust.
We use cookies on our website to give you the most relevant experience by remembering your preferences and repeat visits. By clicking “Accept”, you consent to the use of ALL the cookies.
This website uses cookies to improve your experience while you navigate through the website. Out of these, the cookies that are categorized as necessary are stored on your browser as they are essential for the working of basic functionalities of the website. We also use third-party cookies that help us analyze and understand how you use this website. These cookies will be stored in your browser only with your consent. You also have the option to opt-out of these cookies. But opting out of some of these cookies may affect your browsing experience.
Necessary cookies are absolutely essential for the website to function properly. These cookies ensure basic functionalities and security features of the website, anonymously.
Cookie
Duration
Description
cookielawinfo-checkbox-advertisement
1 year
The cookie is set by GDPR cookie consent to record the user consent for the cookies in the category "Advertisement".
cookielawinfo-checkbox-analytics
11 months
This cookie is set by GDPR Cookie Consent plugin. The cookie is used to store the user consent for the cookies in the category "Analytics".
cookielawinfo-checkbox-functional
11 months
The cookie is set by GDPR cookie consent to record the user consent for the cookies in the category "Functional".
cookielawinfo-checkbox-necessary
11 months
This cookie is set by GDPR Cookie Consent plugin. The cookies is used to store the user consent for the cookies in the category "Necessary".
cookielawinfo-checkbox-others
11 months
This cookie is set by GDPR Cookie Consent plugin. The cookie is used to store the user consent for the cookies in the category "Other.
cookielawinfo-checkbox-performance
11 months
This cookie is set by GDPR Cookie Consent plugin. The cookie is used to store the user consent for the cookies in the category "Performance".
viewed_cookie_policy
11 months
The cookie is set by the GDPR Cookie Consent plugin and is used to store whether or not user has consented to the use of cookies. It does not store any personal data.
Functional cookies help to perform certain functionalities like sharing the content of the website on social media platforms, collect feedbacks, and other third-party features.
Performance cookies are used to understand and analyze the key performance indexes of the website which helps in delivering a better user experience for the visitors.
Analytical cookies are used to understand how visitors interact with the website. These cookies help provide information on metrics the number of visitors, bounce rate, traffic source, etc.
Cookie
Duration
Description
_ga
2 years
This cookie is installed by Google Analytics. The cookie is used to calculate visitor, session, campaign data and keep track of site usage for the site's analytics report. The cookies store information anonymously and assign a randomly generated number to identify unique visitors.
_gat_gtag_UA_205394389_1
1 minute
This cookie is set by Google and is used to distinguish users.
_gid
1 day
This cookie is installed by Google Analytics. The cookie is used to store information of how visitors use a website and helps in creating an analytics report of how the website is doing. The data collected including the number visitors, the source where they have come from, and the pages visted in an anonymous form.
CONSENT
16 years 4 months 12 days 13 hours
These cookies are set via embedded youtube-videos. They register anonymous statistical data on for example how many times the video is displayed and what settings are used for playback.No sensitive data is collected unless you log in to your google account, in that case your choices are linked with your account, for example if you click “like” on a video.
Advertisement cookies are used to provide visitors with relevant ads and marketing campaigns. These cookies track visitors across websites and collect information to provide customized ads.
Cookie
Duration
Description
IDE
1 year 24 days
Used by Google DoubleClick and stores information about how the user uses the website and any other advertisement before visiting the website. This is used to present users with ads that are relevant to them according to the user profile.
NID
6 months
This cookie is used to a profile based on user's interest and display personalized ads to the users.
test_cookie
15 minutes
This cookie is set by doubleclick.net. The purpose of the cookie is to determine if the user's browser supports cookies.
VISITOR_INFO1_LIVE
5 months 27 days
This cookie is set by Youtube. Used to track the information of the embedded YouTube videos on a website.
YSC
session
This cookies is set by Youtube and is used to track the views of embedded videos.
yt-remote-connected-devices
never
These cookies are set via embedded youtube-videos.
yt-remote-device-id
never
These cookies are set via embedded youtube-videos.